
Three months ago, I was standing in my cramped kitchen, staring at a pile of spices that had taken over my entire counter (again), when my husband walked in and said, “You know, we could just put up some shelves.” I’d been avoiding floating shelves for years—honestly, the whole “drilling into walls” thing intimidated me, and I’d convinced myself they’d look too modern for our 1960s ranch. But that morning, with turmeric scattered across my cutting board because I’d knocked over the spice rack for the third time that week, I finally admitted defeat.
Best decision I’ve made in ages. Those simple IKEA floating shelves (the LACK ones—about $8 each) didn’t just solve my spice situation. They completely changed how I think about using wall space throughout our entire house. And the installation? Way easier than I’d imagined, though I definitely made some rookie mistakes along the way.
I’ve now installed floating shelves in our kitchen, both bathrooms, and our master bedroom, and I’ve learned there’s definitely a right way and a wrong way to approach each space. Let me walk you through what I’ve discovered—including the shelf that crashed down at 2 AM because I ignored my own advice about finding wall studs.
Why Floating Shelves Work (When They’re Done Right)
Here’s the thing about floating shelves—they’re not just trendy Instagram decor. They solve real storage problems without eating up floor space, which is huge in older homes like ours where every square foot counts. Unlike traditional shelving units that create visual bulk, floating shelves seem to disappear into the wall, making rooms feel larger while adding functionality.
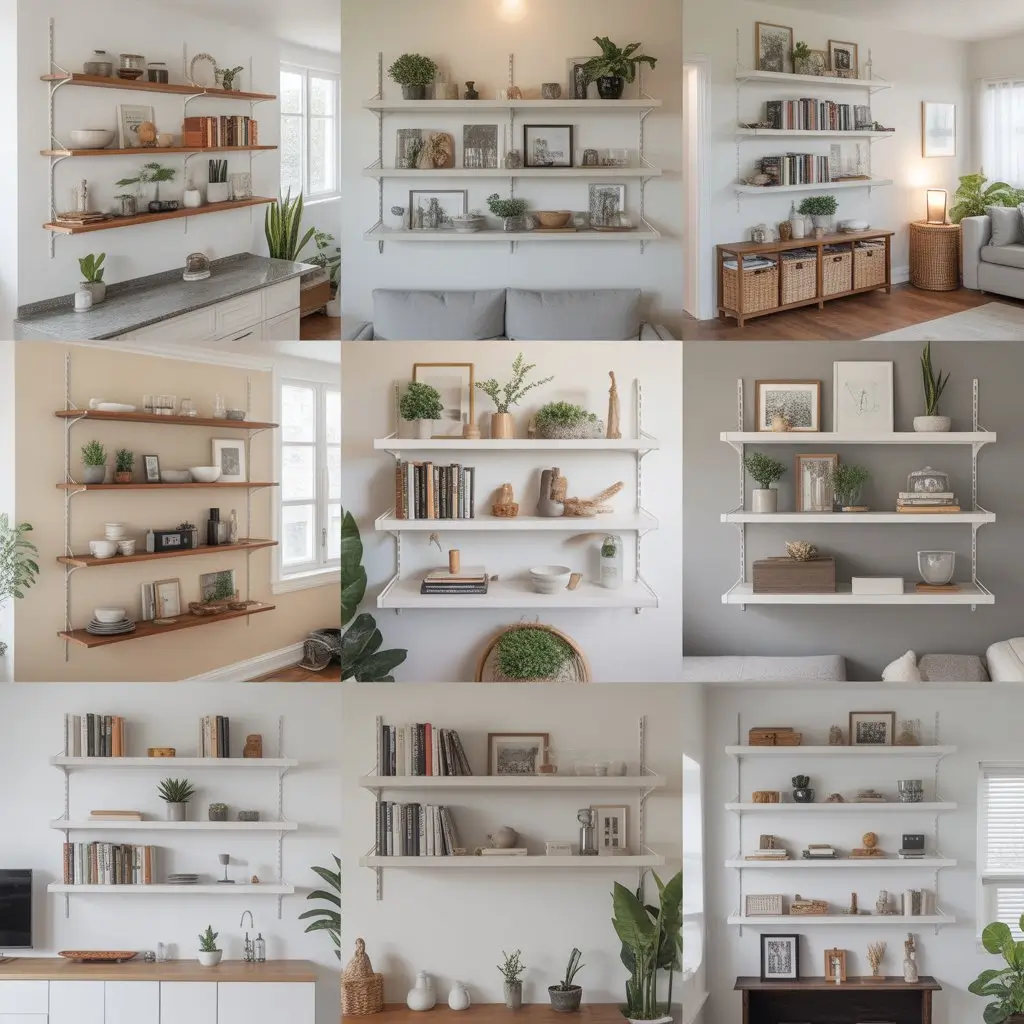
I’ve found they work best when you follow what I call the “Rule of Odds”—always style them with three or five objects rather than even numbers. Sounds arbitrary, but trust me on this one. And mount them at eye level whenever possible—around 57-60 inches from the floor. This creates natural focal points that draw the eye up and make ceilings appear higher.
But here’s where I messed up initially: I got so excited about the aesthetic possibilities that I skipped the boring stuff—like making sure I hit wall studs. That beautiful reclaimed wood shelf I’d splurged on ($45 from a local artisan) came crashing down three weeks later, taking my favorite ceramic vase with it. Now I always use a stud finder, even for lightweight shelves. Better safe than sorry (and less expensive in the long run).
Kitchen: Where Form Meets Function
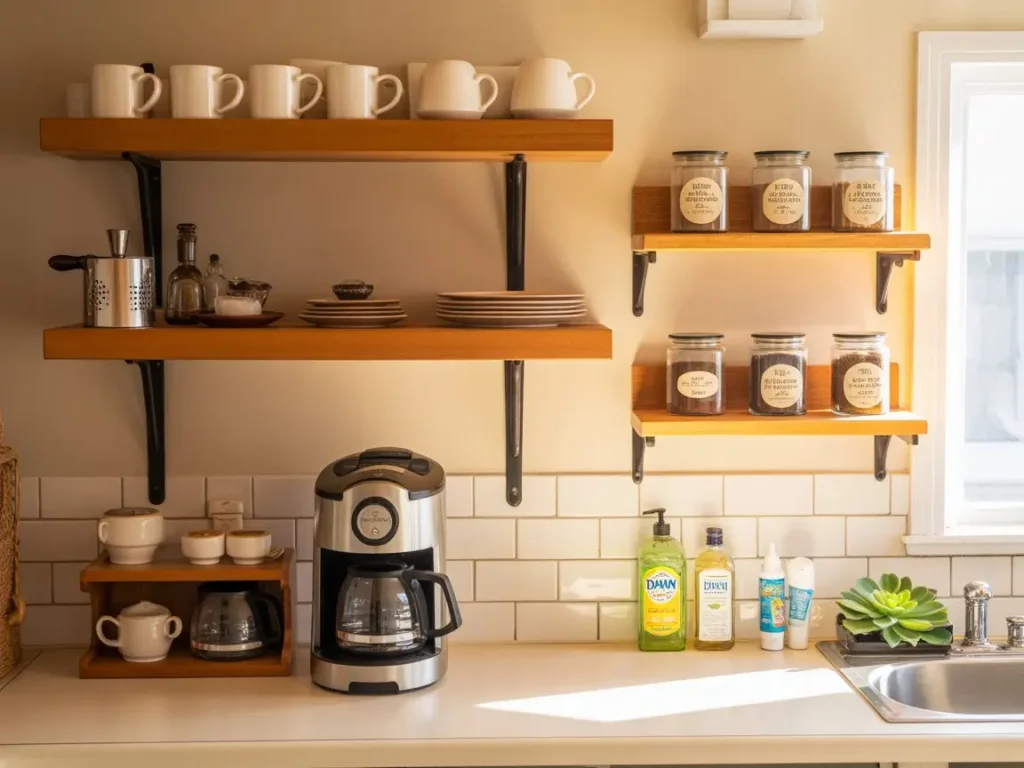
The kitchen is where floating shelves really shine. I started with two 24-inch shelves above my coffee station—one for mugs, another for coffee supplies. What I didn’t expect was how much more organized this would make my morning routine. Everything’s visible and within reach, which means no more digging through cabinets before I’ve had caffeine.
For spices, I installed three narrow shelves (about 4 inches deep) next to the stove. I bought matching glass jars from IKEA—the RAJTAN ones, about $1.50 each—and labeled them with my label maker. Game changer. The whole setup cost me less than $40 and probably saves me 10 minutes of searching every time I cook.
One tip I learned the hard way: keep kitchen shelves at least 18 inches away from your cooktop. I initially mounted my spice rack too close, and the heat from cooking warped the wood slightly. Not a disaster, but definitely something to avoid.
If you’re dealing with a small kitchen like mine, consider corner floating shelves. I found a set at Home Depot for about $25 that perfectly fits in the awkward space above my sink. They’re perfect for storing items you use daily but don’t necessarily want cluttering your counters—dish soap, hand lotion, and a small succulent that somehow thrives in kitchen steam.
Bathroom: Small Space, Big Impact
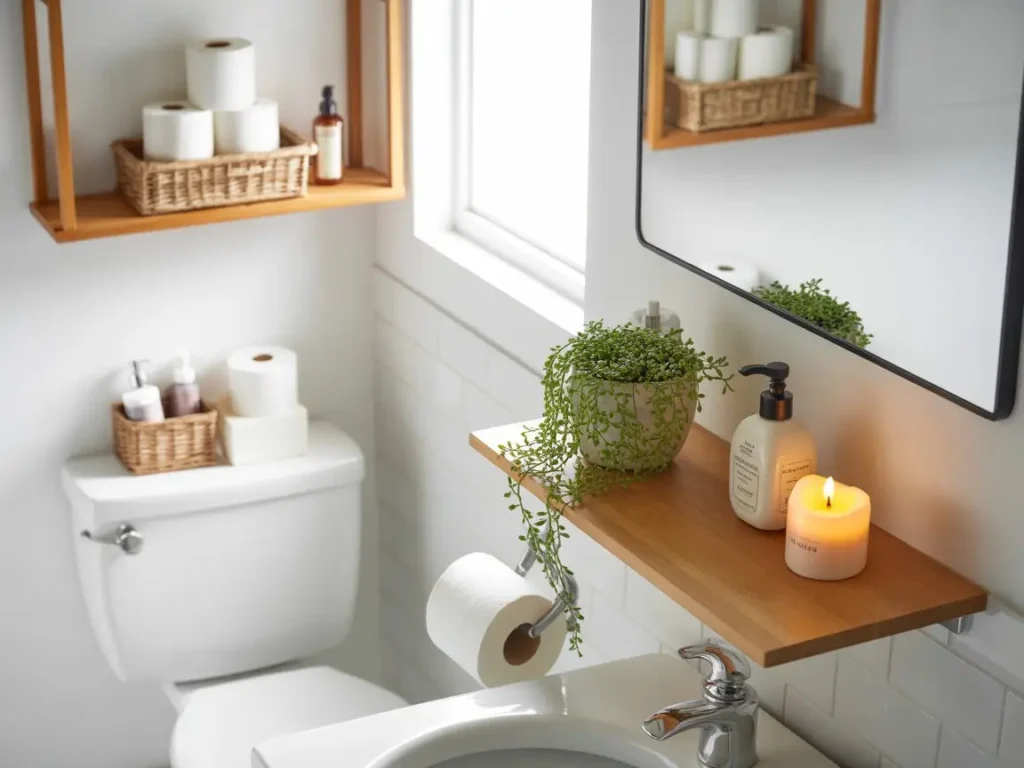
Bathrooms present unique challenges—moisture, limited wall space, and the need for practical storage. I’ve installed floating shelves in both our main bathroom and the powder room, and the key is choosing the right materials and placement.
In our main bathroom, I went with bamboo shelves from Target (about $15 each) because they handle humidity better than regular wood. I mounted one above the toilet for extra towels and toilet paper and another next to the medicine cabinet for daily skincare products. The trick is keeping items contained—I use small woven baskets from the dollar store to corral smaller items like hair ties and cotton swabs.
The powder room got a single walnut shelf above the sink, styled with a small plant (pothos—they love bathroom humidity), hand soap, and a pretty candle. This tiny addition made the space feel more intentional and guest-worthy. Sometimes one well-placed shelf is all you need.
Here’s what I wish I’d known earlier: always seal wood shelves in bathrooms, even if they’re labeled as moisture-resistant. I learned this after my first set started showing water spots after about six months. A simple coat of polyurethane (I used Minwax, about $12) makes all the difference.
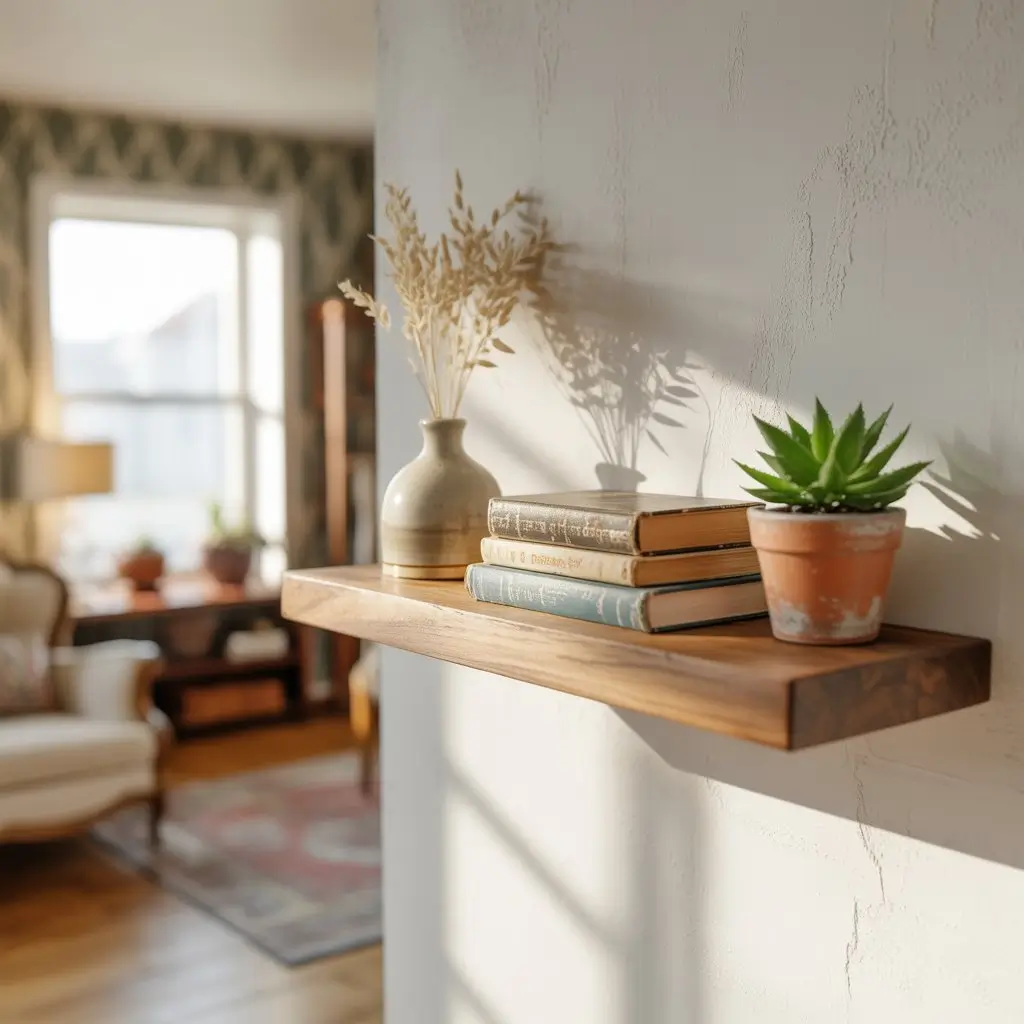
Bedroom: Personal Sanctuary Meets Storage
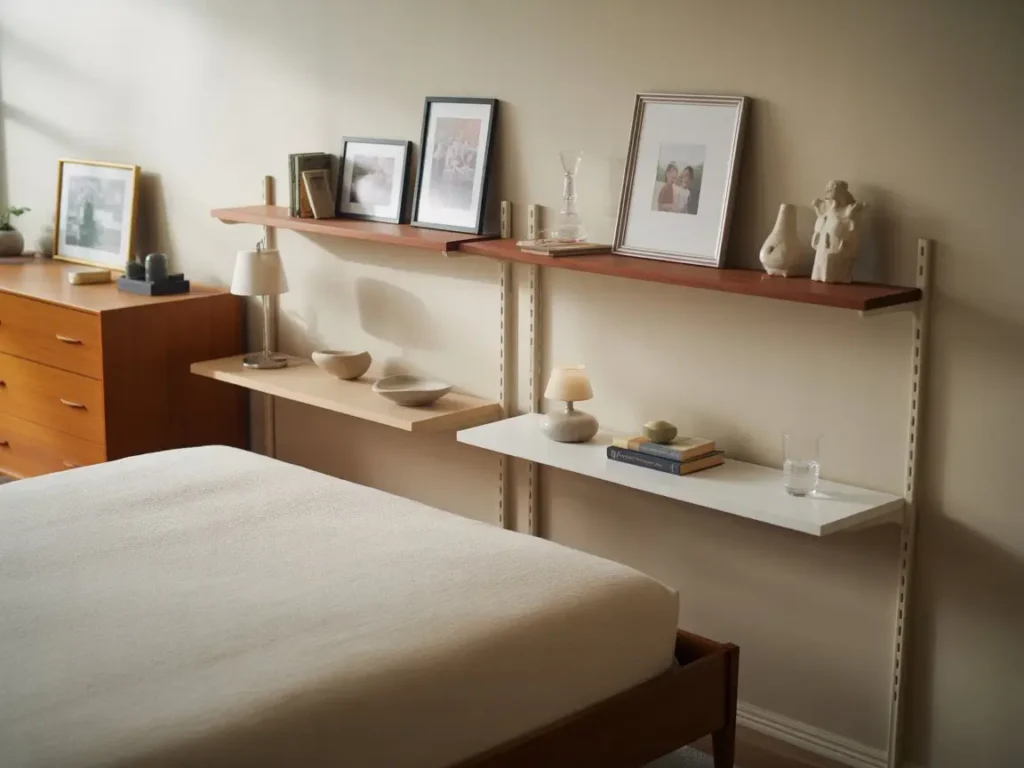
The bedroom is where floating shelves can get really personal. I installed a pair on either side of our bed to replace bulky nightstands—we needed the floor space, and honestly, the clean lines work better with our mid-century modern bed frame.
Each shelf holds the essentials: a lamp, a book, a small dish for jewelry, and a glass of water. The key is keeping it minimal. I made the mistake initially of trying to cram too much onto these shelves, and it looked cluttered rather than serene. Less is definitely more in bedroom spaces.
Above our dresser, I created a small gallery wall with two floating picture ledges from IKEA (the MOSSLANDA ones—about $6 each). They’re perfect for rotating artwork and photos without putting nail holes in the wall every time I want to change things up. Right now they’re holding family photos and a small piece of pottery I picked up at a local art fair.
For smaller bedrooms, consider shelves in unexpected places. I helped my neighbor install a floating shelf above her bedroom door—it’s perfect for storing off-season items or books she’s not currently reading. Out of sight but easily accessible when needed.
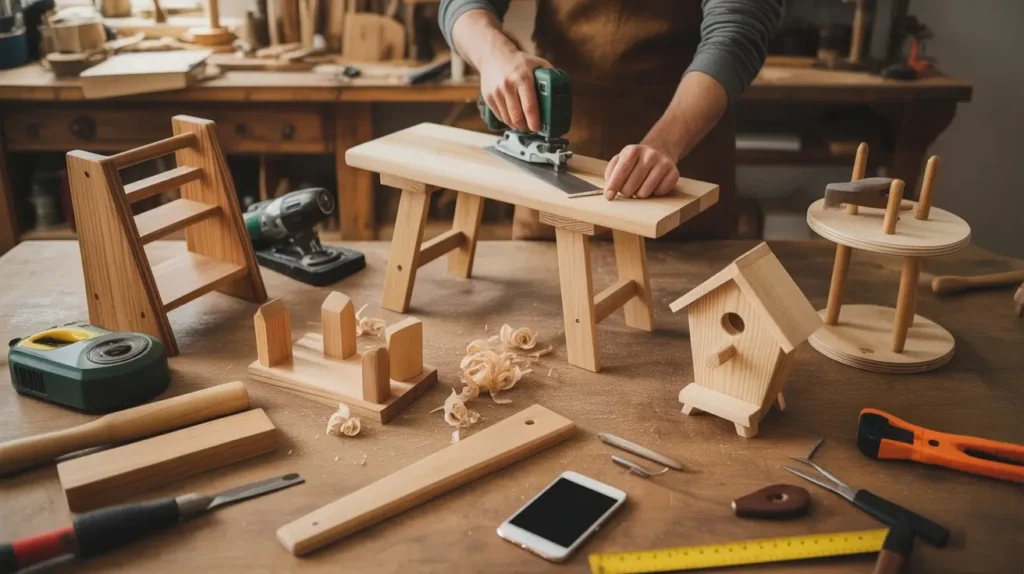
Installation Reality Check
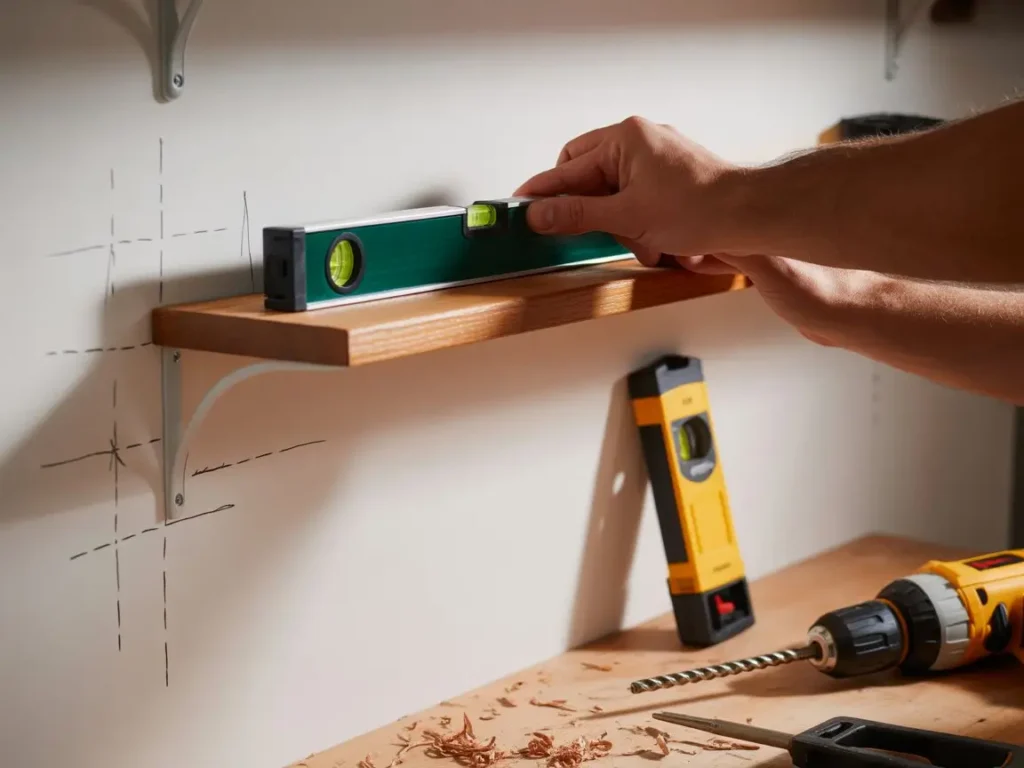
Let me be brutally honest about installation—it’s not as scary as I thought, but there are definitely things I wish someone had told me upfront. First, invest in a good stud finder. I tried using the “knock on the wall” method initially and ended up with that crashed shelf I mentioned earlier.
Most floating shelf installations take me about 30 minutes per shelf now, but my first one took nearly two hours because I was being overly cautious (which, honestly, isn’t the worst approach). You’ll need a level—and actually use it. I skipped this step once and ended up with a shelf that looked drunk. Not cute.
For tools, you really just need a drill, a level, a stud finder, and a pencil for marking. I use a 3/16-inch drill bit for most installations, though check your specific shelf requirements. And always drill pilot holes—I cracked a wall once by being impatient and going straight in with the screw.
Styling Secrets That Actually Work
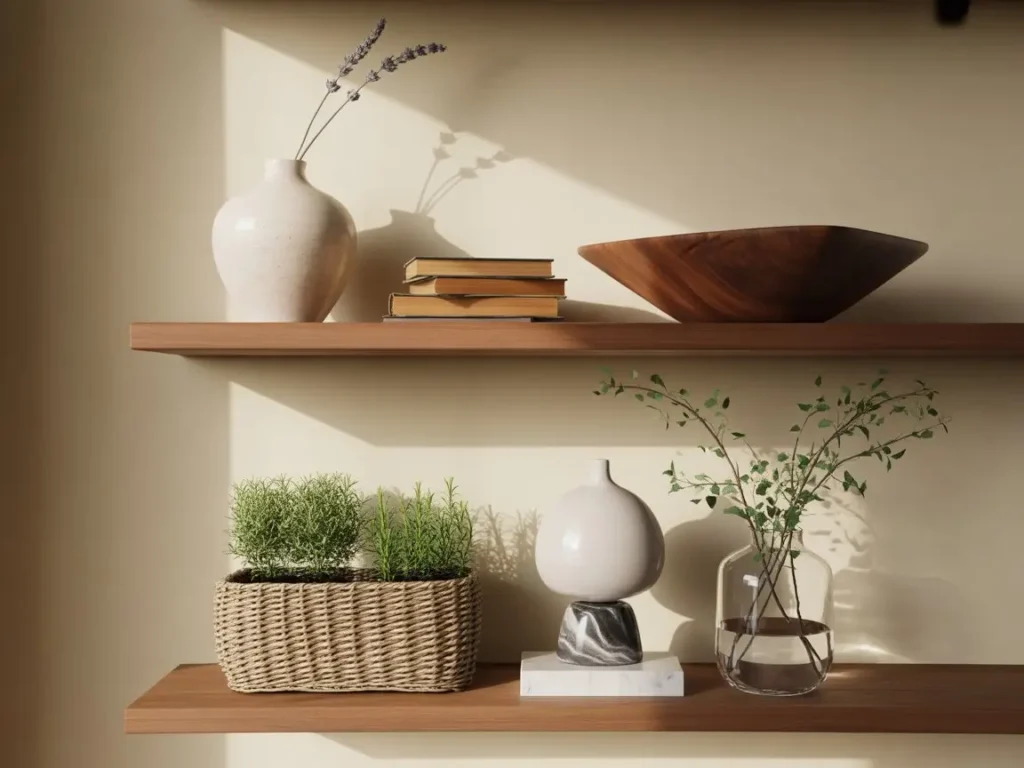
Here’s where the magic happens—styling your shelves so they look intentional rather than random. I follow a loose formula: something tall (a vase or candlestick), something medium (a small plant or book stack), and something low (a decorative bowl or small sculpture). This creates visual rhythm and keeps things interesting.
Texture mixing is huge. I’ll combine smooth ceramics with rough woven baskets, matte finishes with something glossy, and natural materials with manufactured ones. It keeps the eye engaged without being overwhelming.
Don’t forget negative space—every shelf doesn’t need to be packed full. Some of my favorite styled shelves have just one or two carefully chosen objects with plenty of breathing room around them. This is especially important in smaller spaces where visual clutter can make rooms feel cramped.
For seasonal updates, I keep a small collection of rotating objects stored in a basket in our closet. Spring brings small potted herbs, summer might mean beach glass in a clear vase, and fall calls for mini pumpkins or interesting branches. It’s an easy way to keep things fresh without major overhauls.
Common Mistakes (That I’ve Made)
Overcrowding is the big one. When I first discovered floating shelves, I wanted to use every inch of space. The result looked more like a storage unit than thoughtful décor. Now I aim to use about 60% of the available shelf space, leaving room for things to breathe.
Ignoring proportions will make your shelves look wrong even if you can’t pinpoint why. Small shelves work better with smaller objects, and vice versa. I once tried to put a large ceramic bowl on a narrow shelf, and it looked ridiculous—like it was about to tumble off at any moment.
Not securing properly—I can’t stress this enough. Even lightweight decorative items can become dangerous if a shelf isn’t properly mounted. Always find those wall studs, especially if you’re putting anything heavier than a small plant on your shelves.
Making It Work for Your Space
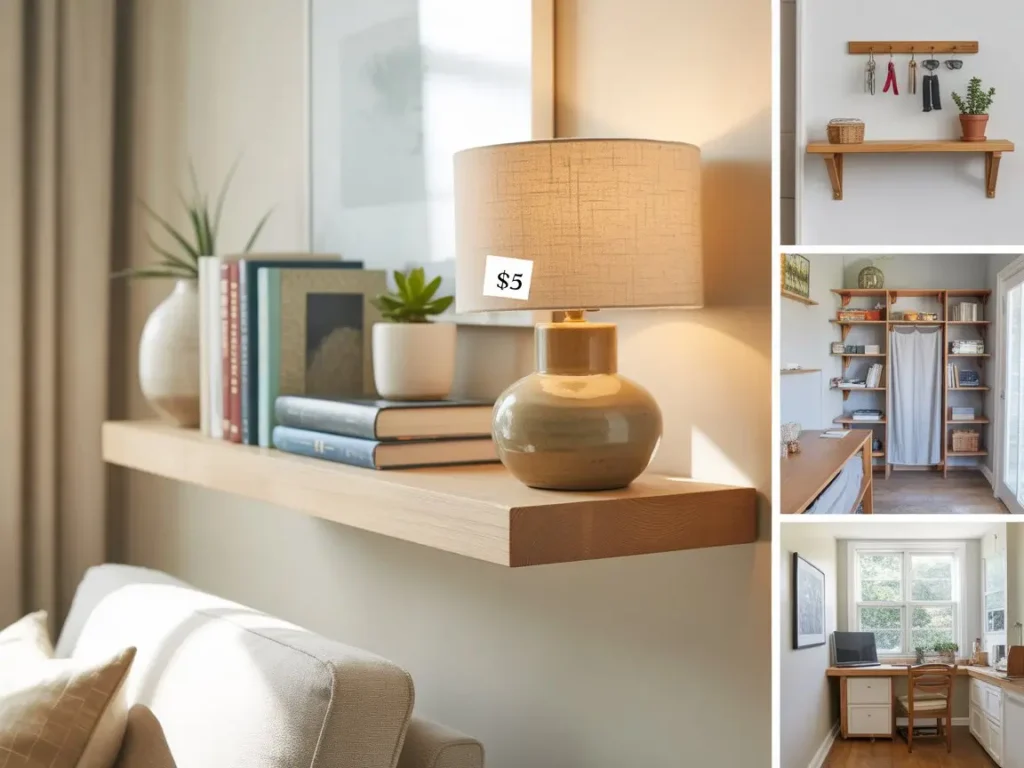
The beauty of floating shelves is their adaptability. In our living room, I used them to create a mini library next to our reading chair. In the entryway, a single shelf holds keys, sunglasses, and a small dish for pocket change—functional but tidy.
Think about your daily routines and pain points. Where do you find yourself wishing for just a little more storage? That’s probably where a floating shelf could make a real difference. They work in almost any space—I’ve seen them used brilliantly in laundry rooms, home offices, and even walk-in closets.
The key is starting small. Pick one problem area and solve it with a single shelf. Live with it for a few weeks, see how you use it, then expand from there. This approach keeps costs manageable (most shelves run $5-30 depending on size and material) and lets you learn what works in your specific space.
Frequently Asked Questions About Floating Shelves
What is the rule of 3 for shelves?
The Rule of 3 (or Rule of Odds) means styling shelves with odd numbers of objects—typically 3 or 5 items per shelf. This creates visual balance and flow that’s more pleasing to the eye than even-numbered arrangements.
Where should floating shelves be placed?
Mount floating shelves at eye level (57-60 inches from the floor) whenever possible. In kitchens, keep them 18+ inches from cooktops. In bathrooms, above toilets and next to mirrors work well. Always secure to wall studs for safety.
How much weight can floating shelves hold?
This depends on the shelf and mounting system, but most standard floating shelves hold 20-50 pounds when properly mounted to wall studs. Always check manufacturer specifications and don’t exceed weight limits.
What’s the best depth for floating shelves?
For decorative items: 6-8 inches deep. For books: 8-10 inches. For kitchen storage: 4-6 inches for spices, 8-12 inches for dishes. Deeper shelves can look bulky in smaller rooms.
What tools do I need to install floating shelves?
Essential tools: stud finder, drill, level, pencil for marking, and appropriate drill bits. Most installations take 20-30 minutes per shelf once you get the hang of it.
Transform Your Space One Shelf at a Time
After eight months of living with floating shelves throughout our house, I can honestly say they’ve been one of my best decorating investments. For less than $100 total, I’ve solved storage problems in every room, created beautiful display spaces, and made our home feel more organized and intentional.
The versatility is incredible—whether you’re dealing with a cramped kitchen, a tiny bathroom, or a bedroom that needs more surface space, floating shelves adapt to your needs. They work in rentals (just patch the holes when you move), tight budgets (many options under $15), and any décor style from farmhouse to modern.
But here’s what I love most: they’re completely customizable to your life. My spice shelves might not work for your cooking style, and your bedroom setup might look terrible in my space—and that’s perfectly fine. The beauty is in making them work for your daily routines and storage needs.
Don’t overthink it. Start with that one problem area that’s been bugging you for months. Pick up a simple shelf, grab your drill, and give it a try. I guarantee you’ll be surprised by the difference it makes—and probably plotting your next shelf installation before you’ve even finished styling the first one.
I’d love to hear about your floating shelf adventures! Drop a comment below with photos of your installations, questions about tricky spots, or your own styling discoveries. And if this helped you tackle a storage problem, share it with a friend who’s still staring at cluttered counters—they’ll thank you later.