The holidays are a time for warmth, creativity, and personal touches that make memories last a lifetime. What better way to celebrate than by crafting your own felt Christmas ornaments? These delightful decorations are not just cost-effective but also allow you to infuse your tree with love and personality. Whether you’re a seasoned crafter or picking up a needle for the first time, this guide will walk you through every step of the process, ensuring your ornaments shine as brightly as the season itself.
DIY Felt Christmas Ornaments are more than just decorations; they’re a way to add unique, personal touches to your home while starting a tradition that can be cherished for generations. The simplicity of these handmade treasures, combined with the stories they carry, makes them truly special. Each stitch and every embellishment adds heartfelt meaning to your holiday decor, making it more memorable and magical with each passing year.
Table of Contents
The Felt Frontier: A Complete Guide to Ornament-Making Materials
Before diving into the crafting process, let’s talk about the materials you’ll need to succeed. Having the right tools and materials will ensure your felt ornaments turn out beautifully and last for years to come.
Choosing the Right Felt for Your Ornaments

The type of felt you use has a considerable impact on the overall beauty and longevity of your ornaments. Below is a breakdown of the most popular sorts of felt:
- Wool Felt: Known for its premium quality, wool felt is soft, durable, and vibrant in color. It holds its shape well and gives a rich texture to your ornaments. This type of felt is ideal if you’re looking to make high-end, long-lasting decorations.
- Acrylic Felt: This budget-friendly option comes in a wide variety of colors and is easy to find at most craft stores. While it is less durable and doesn’t have the same rich texture as wool felt, acrylic felt is a great choice for beginners or if you’re looking to create a large batch of ornaments without breaking the bank.
- Wool Blend Felt: A mix of wool and synthetics, this felt strikes a balance between quality and affordability. It combines the softness and richness of wool with the practicality of synthetic fibers, making it a versatile choice for ornament-making.
Essential Tools for Felt Ornament Crafting
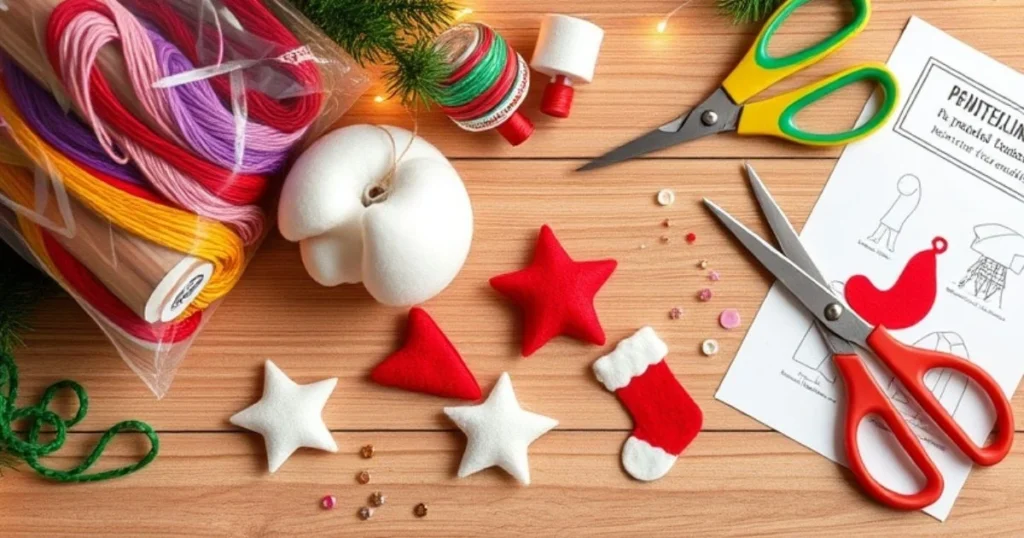
Having the proper equipment on hand can make the process of making ornaments much easier and more pleasant. Here’s a list of the necessities you’ll require:
- Needles and Embroidery Floss: Needles specifically designed for embroidery are perfect for working with felt. Embroidery floss comes in a variety of colors and is ideal for stitching your ornaments together and adding decorative details like stars, trees, or other holiday patterns.
- Scissors: A sharp pair of fabric scissors is crucial for making clean, precise cuts on your felt. This helps to create neat edges and ensures that your ornament shapes are consistent.
- Polyfill: If you’re making plush, stuffed ornaments, polyfill is a must. It provides softness and structure, making your ornaments look more three-dimensional and tactile.
- Templates: Printable templates or patterns help to guide your cutting and stitching, especially if you’re creating intricate designs. You can either buy pre-made templates or make your own to fit your unique vision.
- Decorative Embellishments: To give your ornaments a little sparkle and shine, gather some beads, sequins, or glitter. These decorative elements add that special finishing touch, making your ornaments stand out on your tree.
Step-by-Step Guide to DIY Felt Christmas Ornaments
Now that you have all your materials ready, it’s time to dive into the fun part: creating your very own felt Christmas ornaments. Follow these simple steps to craft your ornaments with care, ensuring they shine as beautifully as your holiday spirit.
1. Select Your Ornament Design
Begin by selecting a design that appeals to you. Beginners may wish to start with simple shapes such as stars, hearts, or stockings. These shapes are simple to cut and sew, making them an excellent starting point for producing felt ornaments. If you’re feeling brave or have more skill, you can experiment with more elaborate drawings like as animals, trees, or layered scenes that convey a story.
- Simple Ideas: Stars, hearts, Christmas trees, stockings, bells.
- Advanced Ideas: Animals, snowmen, layered winter scenes, or angels.
2. Create and Trace Templates
Once you’ve settled on a design, it’s time to make a template. You can either draw your design freehand on paper or use tools like cookie cutters or printable patterns to create a guide. Tracing your design ensures that your ornaments will have even, symmetrical shapes.
- Tip: If you’re using cookie cutters, simply press them onto a sheet of paper and trace around the edges to create a template.
- Tip: Use a pencil or fabric marker to trace your design onto the back of the felt to avoid visible marks on the finished ornament.
3. Cut and Prepare Your Felt Pieces
Next, cut out two identical shapes for each ornament—one for the front and one for the back. Sharp fabric scissors are key to making clean, precise cuts that will give your ornaments a polished look. Take your time and make sure both pieces are cut accurately.
- Tip: If you’re making more than one ornament, it might help to stack your felt pieces and cut them all at once for efficiency.
- Tip: Cutting slowly along the traced lines will help you maintain a consistent shape and avoid jagged edges.
4. Decorate the Front of Your Ornament
Before sewing the pieces together, decorate the front of your ornament to add some personal flair. This is where you can get creative!
- Stitching: Use embroidery floss to add intricate designs like stars, snowflakes, or holiday-themed patterns. Simple running stitches, blanket stitches, or cross-stitching can elevate your design.
- Embellishments: Attach beads, buttons, sequins, or glitter to enhance the ornament’s visual interest. These embellishments can bring extra sparkle and texture to your piece.
5. Assemble Your Ornament
Now it’s time to bring your ornament together! Place the two felt pieces together with the right sides facing each other. Using a needle and embroidery floss, stitch around the edges using a blanket stitch or whip stitch. Leave a small opening at the top of the ornament for stuffing later.
- Tip: A blanket stitch provides a decorative edge, while a whip stitch is quicker and simpler for those new to stitching.
6. Add Dimension with Stuffing
Once the ornament is stitched nearly shut, it’s time to add some dimension with polyfill. Gently stuff the ornament with polyfill until it’s lightly but evenly filled. This will give your ornament a soft, three-dimensional look.
- Tip: Don’t overstuff the ornament—leave it soft and pliable for a more polished and professional finish.
- Tip: Use a pencil or a similar object to push the stuffing into smaller corners and tight areas.
7. Attach a Hanger
To finish off your ornament, add a hanger so you can display it on your tree or around your home. Cut a small piece of ribbon or twine, then sew or glue it securely to the top of the ornament. This will make it easy to hang and show off your handmade creation.
- Tip: For a more secure attachment, sew the ribbon in place with a few strong stitches.
- Tip: Use a coordinating color of ribbon or twine to match the theme of your ornament.
Tips and Tricks for Beginners

Embarking on your first felt ornament crafting adventure can be exciting, but it’s also helpful to have some tips in your toolkit to make the process smoother and more enjoyable. Here are a few pointers to guide you as you work through your projects.
Choose High-Quality Materials
When it comes to crafting, the materials you use can make a big difference in the final product. Wool felt is a top choice for crafters looking for durability and a premium finish. It holds its shape well, has rich colors, and feels luxurious to the touch. If you’re on a budget, acrylic felt can work just as well, but be aware that it may not last as long or have the same rich texture as wool felt.
- Tip: Invest in wool felt for projects you want to last, such as ornaments that will be part of family traditions.
- Tip: For practice, acrylic felt is a more affordable option.
Start with Simple Designs
It’s easy to get carried away with intricate patterns, but starting with simple designs can help you build confidence and avoid frustration. Start with basic shapes, like hearts, stars, or Christmas trees. Once you’re comfortable with cutting, stitching, and stuffing, you can move on to more complex designs.
- Tip: Simple designs are just as beautiful as complicated ones, and they can still have plenty of personality and charm.
Experiment with Stitches
One of the fun aspects of making felt ornaments is experimenting with different types of stitches. Start with the basics—blanket stitch and whip stitch—as they’re both easy to learn and perfect for beginners. Once you feel comfortable with them, try more intricate stitches like chain stitch or satin stitch to add texture and flair to your ornaments.
- Tip: Keep a few scraps of felt handy to practice your stitches before you start on your ornaments.
Involve Family or Friends
Felt ornament crafting doesn’t have to be a solo project. Turn it into a fun group activity by involving family or friends. This is a great way to make the crafting process more enjoyable, and you can exchange ideas, share techniques, and bond over the holiday spirit. It also makes for a perfect homemade gift project that can be cherished for years to come.
- Tip: Set up a crafting station with all your materials so everyone can join in easily.
Creative Ornament Ideas to Inspire You
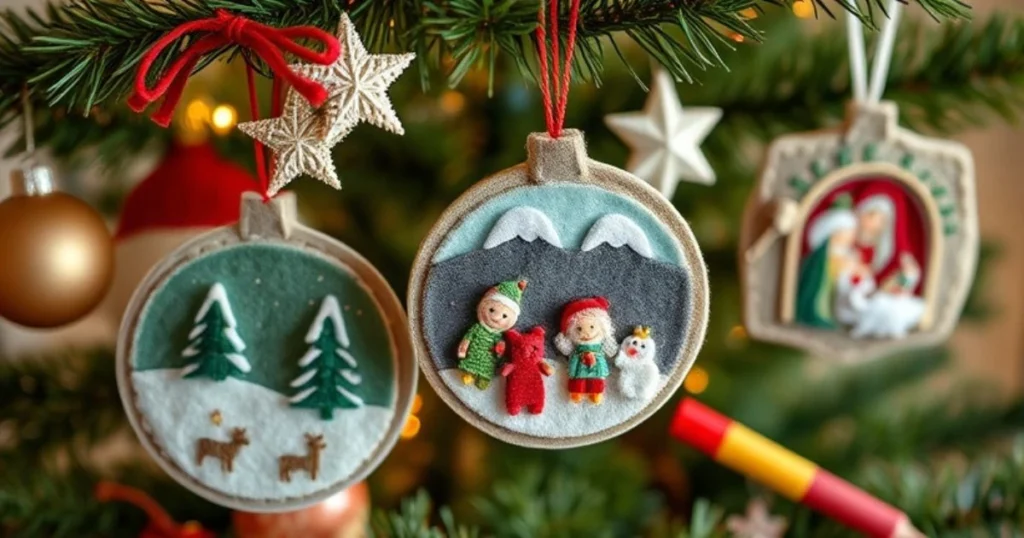
Looking for inspiration? Here are some creative ideas that will take your felt ornaments to the next level, ensuring your tree (or home) stands out with a personal, handmade touch.
Personalized Ornaments
One of the best ways to make your felt ornaments special is by personalizing them. Embroider names, dates, or even small messages on the front of your ornaments. This is a perfect idea for creating family heirlooms or gifts. Personalized ornaments are an ideal way to commemorate milestones like weddings, baby’s first Christmas, or family holidays.
- Tip: Use different colored threads for each name or date to make it visually interesting.
Multi-Layered Felt Scenes
Take your ornaments to the next level by combining multiple layers of felt. Create intricate scenes, like a snowy landscape with layers of trees, snow, and animals, or a nativity scene with different characters and details. The added depth from the layers will make your ornaments visually dynamic and unique.
- Tip: Use fabric glue for layering felt, as it can help hold pieces in place before you stitch them.
Interactive Designs
For a fun twist, incorporate interactive elements into your felt ornaments. Add small pockets to designs like stockings or envelopes that can hold tiny surprises such as messages, small gifts, or candy. These interactive ornaments are not only fun to make but also add an element of surprise and whimsy to your tree or gift-giving.
- Tip: Make sure the pockets are secure and easy to access, so recipients can enjoy their surprises without trouble.
FAQs: Mastering DIY Felt Christmas Ornaments
Q1. Can I make felt ornaments without sewing?
Yes! While sewing provides durability and a polished look, you can absolutely make felt ornaments without a needle and thread. Use a hot glue gun to assemble and embellish your ornaments. This method is quick and perfect for creating ornaments on the fly or if you’re crafting with kids. Simply glue the edges together and decorate with beads, sequins, or embroidery floss for added detail.
Q2. What’s the best way to clean felt ornaments?
Felt ornaments are delicate, and proper cleaning can help preserve their beauty. To clean them, gently dab the surface with a damp cloth and a small amount of mild soap. Avoid soaking wool felt, as this can lead to shrinkage. If your ornaments have intricate embellishments, be careful not to damage any small details while cleaning. For routine maintenance, simply dust them off with a soft cloth to keep them looking fresh.
Q3. How do I ensure my felt ornaments last for years?
Proper storage is key to ensuring your felt ornaments remain in great condition for years to come. Here are a few tips:
- Store your ornaments in airtight containers to protect them from dust and humidity.
- Wrap ornaments in acid-free tissue paper to prevent discoloration or damage from light exposure.
- If your ornaments have delicate embellishments, keep them in a padded box or with extra protection to avoid squishing.
Conclusion: A Festive Tradition You’ll Cherish Forever
Crafting felt Christmas ornaments is more than just a seasonal activity—it’s a heartfelt tradition that brings joy, creativity, and a personal touch to your holiday celebrations. From selecting the perfect materials to experimenting with unique designs, the process is as fulfilling as the finished ornaments themselves. Whether you’re making ornaments for your tree or as thoughtful gifts, the memories you create while crafting will last far beyond the holiday season.

