
From builder-grade blinds to custom looks that don’t break the bank—what I’ve learned after 15 years of wrestling with windows.
I’ll never forget the day we moved into our Portland bungalow back in 2016. The house had “good bones” (real estate code for “everything else needs work”), but the windows? Oh, the windows were dressed in what I can only describe as Depression-era beige vinyl blinds that looked like they’d witnessed several decades of Portland rain. My partner took one look and said, “We’re fixing this, right?” I nodded confidently, thinking I’d knock out all nine windows in a weekend.
That was nine years ago. Some of those windows are still works in progress.
Here’s what I’ve learned: Windows are sneaky. They look simple until you actually start trying to put them together. Then suddenly you’re drowning in measurements, wondering if you need inside mount or outside mount, questioning every fabric choice, and somehow spending $400 at the hardware store when you only went in for curtain rods. But once you figure them out? Windows become these incredible opportunities to completely transform how a room feels—and I mean that in the most dramatic, life-changing way possible.
Why Windows Matter More Than Anyone Tells You
In design school at SCAD, we spent maybe two classes on window treatments. TWO. They basically said, “Curtains control light and add softness,” and moved on to more exciting things like color theory. What they didn’t tell me was that your windows are doing about seventeen jobs simultaneously—controlling light, yes, but also framing views, providing privacy, insulating against weather (crucial in Portland), reducing noise, and serving as massive blank canvases that either enhance or completely sabotage your design scheme.
I learned this the expensive way when I hung beautiful linen curtains in our south-facing living room without considering the afternoon sun. Within six months, those $180 panels had faded to a sad, uneven beige. My SCAD professors would’ve been so disappointed.
Real talk: I’ve made almost every window treatment mistake possible. Hung things backwards, chosen fabrics that shrank, ignored light direction, and underestimated how much fabric you actually need for proper fullness. Each mistake taught me something, though, and now I can walk into a room and immediately know what will and won’t work. You’ll get there too—just maybe faster because you can learn from my disasters.
Understanding Your Options (Without the Overwhelm)
The window treatment world is vast and confusing, so let me break down what I’ve actually used in real life, what worked, and what made me want to cry into my coffee.
Curtains and Drapes: The Classic That Never Disappoints
Floor-length curtains are my go-to for most rooms. They’re forgiving, relatively easy to DIY, and instantly make ceilings look taller if you hang them right. The trick I wish someone had told me earlier: mount your curtain rod way higher than you think—like, up near the ceiling, not just above the window frame. This single change made our dining room feel like it gained six inches of height.
I’ve hung dozens of curtain panels over the years, and here’s what’s currently working in our house: IKEA’s Lenda curtains in our bedroom ($20 per panel—absolute steal), custom linen panels I made for the living room using fabric from JoAnn’s ($65 total for three windows), and some West Elm clearance finds in my daughter’s room that I snagged for 70% off.
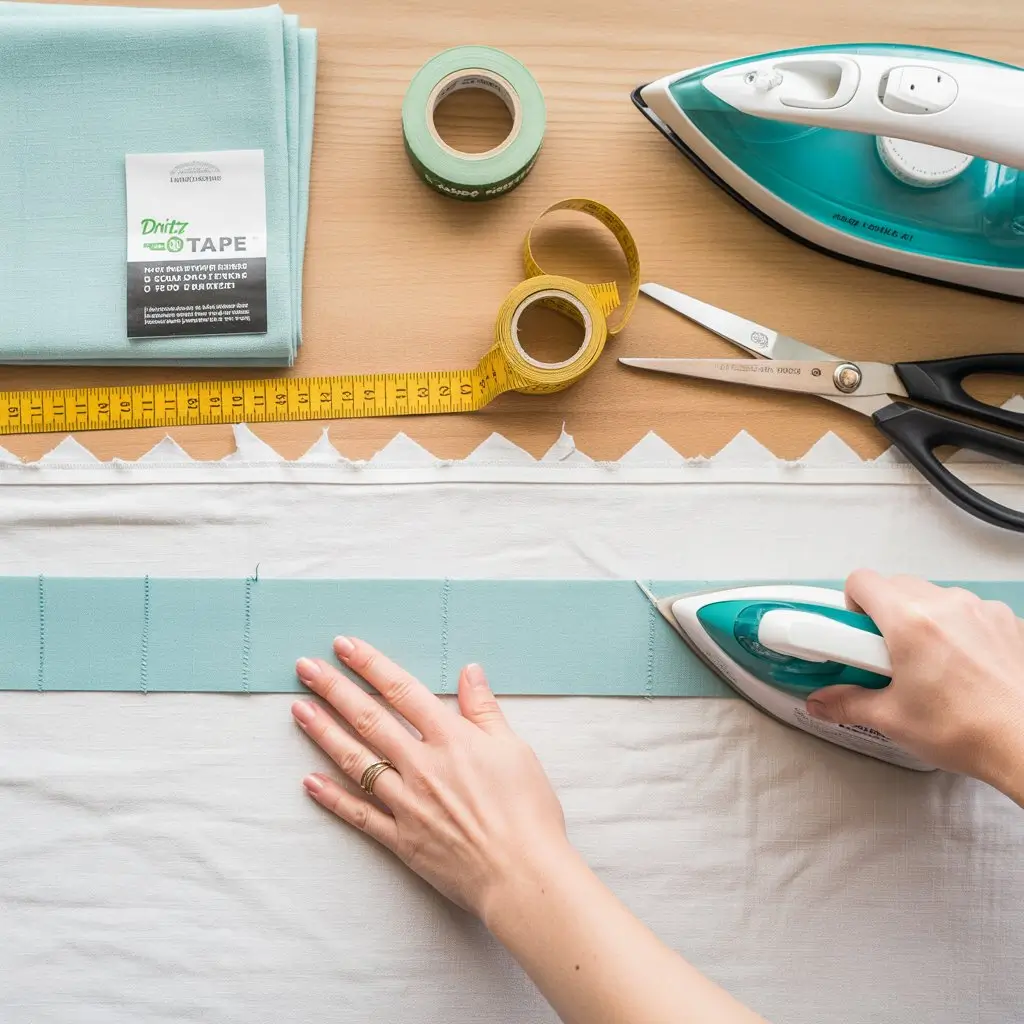
For no-sew curtains, hem tape is genuinely magic. I used Dritz Stitch Witchery to create curtains for our guest room in about 45 minutes, and they’ve held up for three years. Just iron, press, and you’re done. My partner walked by while I was making them and said, “Wait, you’re not using the sewing machine?” Nope. Sometimes the shortcut actually works.
Blinds and Shades: When You Need More Control
Roman shades are my secret weapon for rooms where I need both style and serious light control. We installed them in our bedroom last summer—the Chicology Cordless Roman Shades from Home Depot ($89 each)—and they’ve been absolute game-changers. Portland summer means sunrise at 5:30 am, and these shades plus our curtains create this perfect cave-like darkness that’s saved my sanity.
Wooden blinds work beautifully if you’re going for that warm, natural look. I installed 2-inch faux wood blinds in our bathroom (real wood would warp with the moisture), and they’ve developed this lovely patina over time. Real wood is gorgeous but expensive—I priced it out at Rejuvenation here in Portland and nearly fainted at the $300 per window cost.
Unexpected discovery: Roller blinds don’t have to be boring. I decorated one with fabric paint last year for my son’s room—created this geometric pattern using painter’s tape and Tulip Soft Fabric Paint ($4 per bottle). Took about two hours, and he thinks his room is the coolest in the house. The secret is using a flat-weave roller blind as your canvas, not the textured ones.
The Art of Layering (Or: How I Learned to Stop Worrying and Embrace Complexity)
Okay, layering sounds fancy and complicated, but it’s actually just putting multiple things on the same window. Sheers plus curtains. Blinds plus drapes. Roman shade plus a valance.
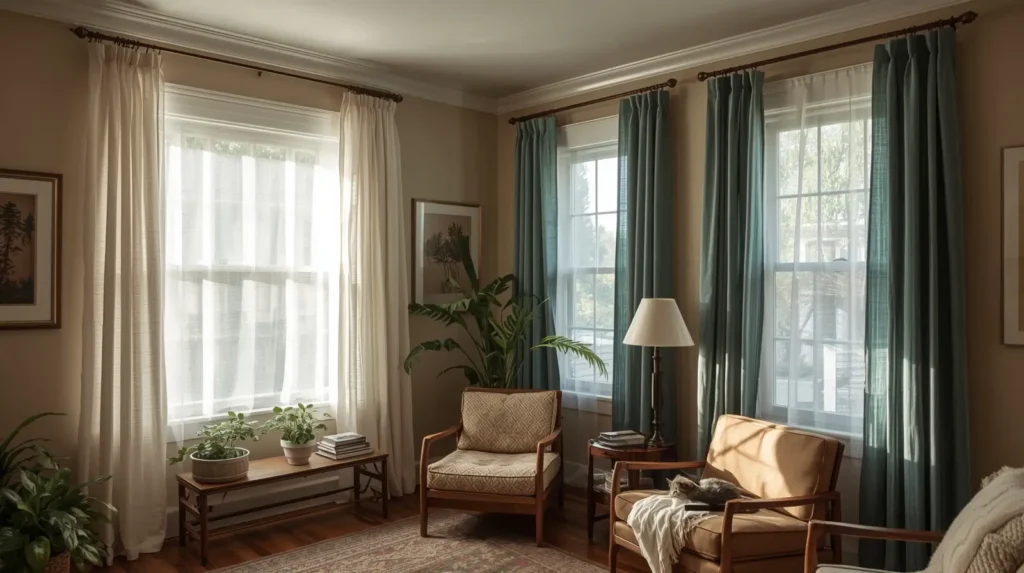
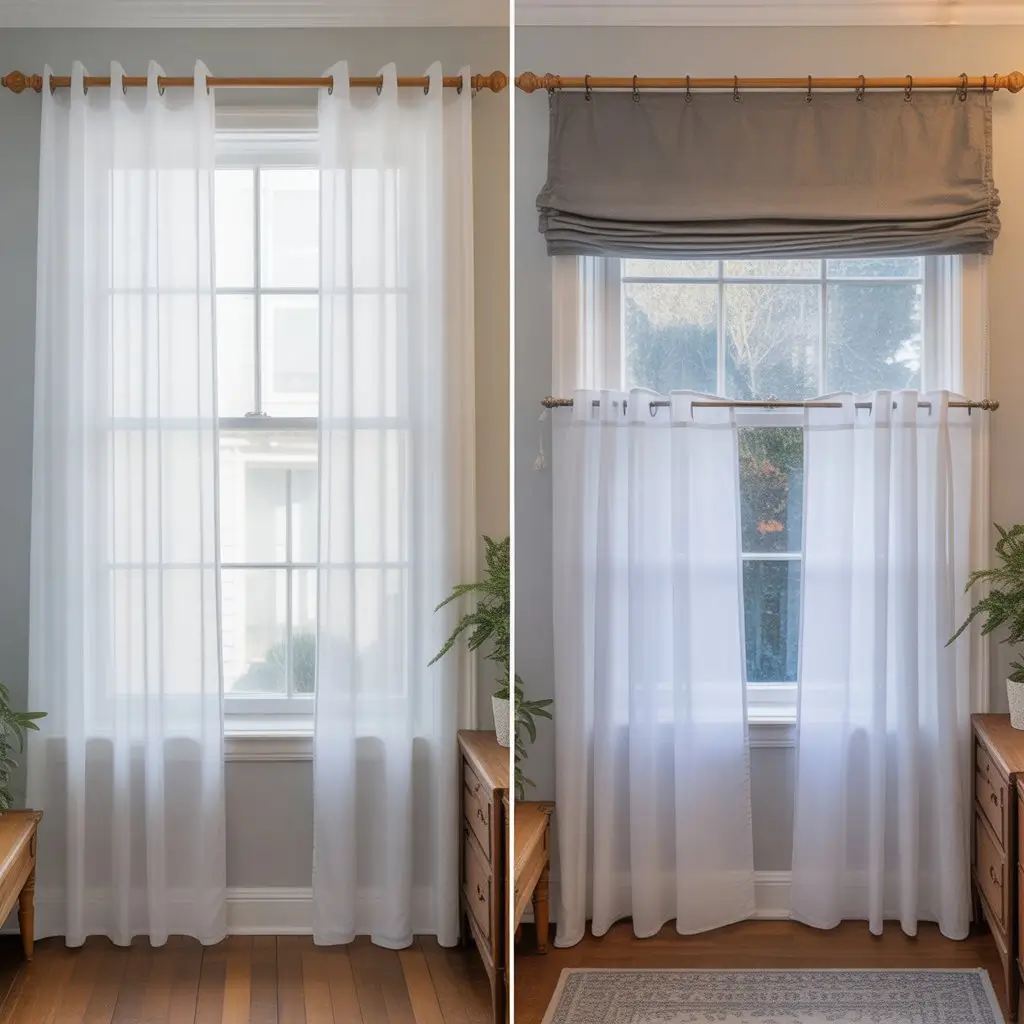
I resisted this for years because it felt excessive. Then I tried it in our living room—sheer white panels from IKEA ($15 each) layered behind heavier linen drapes—and suddenly understood. During the day, I close the heavy drapes, and the sheers diffuse the light into this soft, glowing situation. At night, both layers create extra insulation against our drafty old windows. It’s functional and beautiful, which doesn’t happen often in design.
Color, Pattern, and Making Bold Choices
This is where my design education actually comes in handy. Color and pattern on windows can completely change how a room feels—but I’ve definitely made some questionable choices along the way.
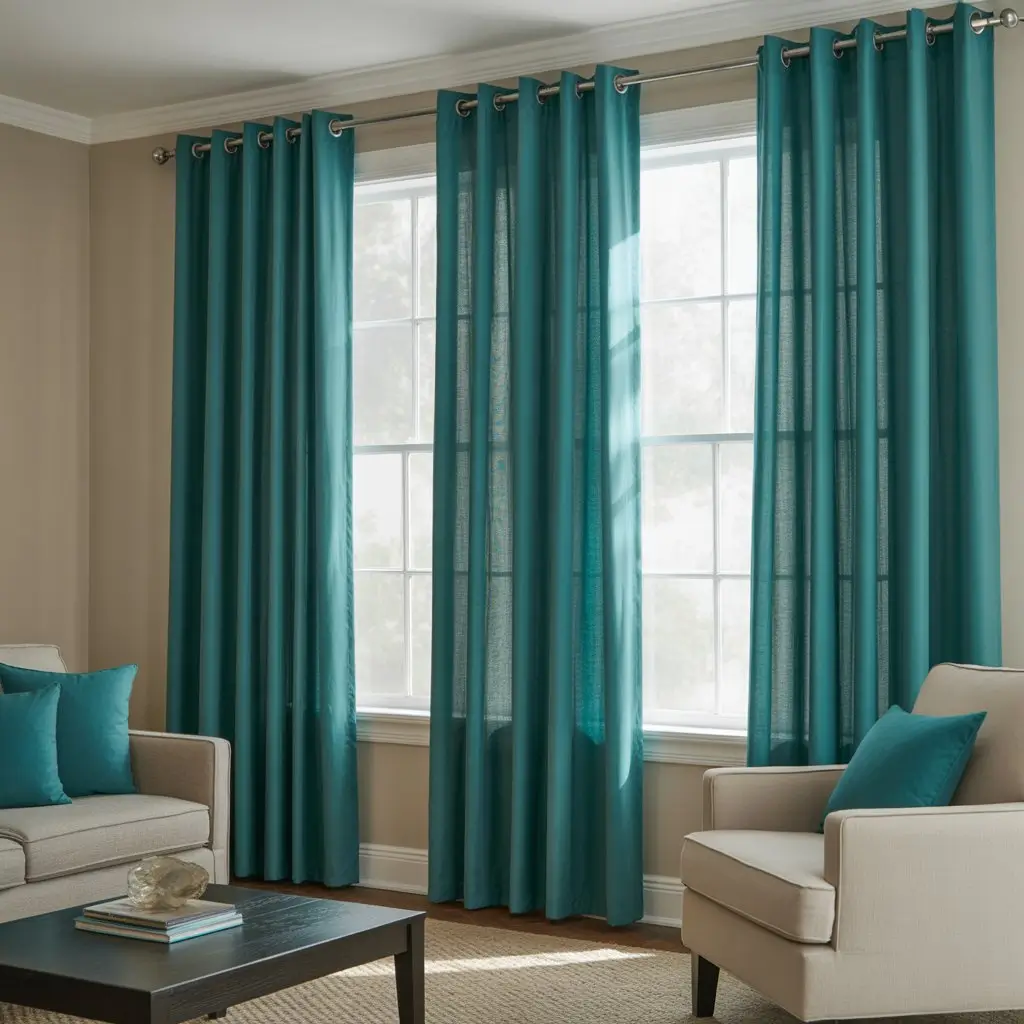
My first bold window decision was hanging vibrant teal curtains in our neutral living room. I was terrified. My partner was skeptical. But those curtains—$45 per panel from Target’s threshold line—completely transformed the space from “nice enough” to “this is the room where we actually want to hang out.” The color reflects onto the walls just slightly, making the whole room feel more alive.
Pattern is trickier. I once bought these intricate floral curtains because they looked amazing in the store. In my dining room? They completely overwhelmed the space and fought with everything else. Returned them, learned my lesson: if your room already has a lot going on (artwork, patterned rugs, busy furniture), keep window treatments simpler. If your room is fairly neutral, windows are the perfect place to inject personality.
Design principle I actually use: The 60-30-10 rule. 60% of your room should be your dominant color (usually walls, large furniture), 30% your secondary color, and 10% your accent color. Windows can play any of these roles depending on what you need. In our bedroom, the walls are soft gray (dominant), the bedding is navy (secondary), and the curtains are dusty blue (pulling both together). It’s not complicated—it’s just intentional.
Matching Without Being Matchy-Matchy
Coordinating window treatments with your bedding or furniture can create this pulled-together look—but the keyword is “coordinate,” not “match exactly.” I learned this when I tried to perfectly match our bedroom curtains to our duvet. It looked like a hotel room catalog. Not in a good way.
Instead, I now work with complementary colors and similar patterns. Our guest room has a Roman shade in a muted stripe that picks up colors from the quilt without copying it exactly. The effect is cohesive without being too precious.
DIY Projects That Are Actually Worth Your Time
I’ve attempted approximately fifty-seven DIY window projects over the years. Some were brilliant. Many were disasters. Here are the ones worth your effort:
No-Sew Curtains (The Gateway Drug)
Start here if you’re new to window DIY. Buy fabric you love (I get mine from JoAnn’s when they have their 60% off sales), cut to length, and use hem tape on the bottom and sides. Add clip rings to the top, hang on a rod. Total time: under an hour per panel. Total cost: usually $15-30 per panel , depending on fabric choice.
I made no-sew curtains for three windows in our guest room using this method, and even my sewing-expert mother-in-law couldn’t tell they weren’t properly sewn. She actually asked who I’d hired to make them. Best compliment ever.
Upcycled Fabric Adventures
This is where things get fun and weird. I’ve made window treatments from vintage tablecloths (Goodwill, $4 each), old quilts that were too damaged to use on beds, and even a gorgeous piece of sari fabric I found at an estate sale for $8.
The sari fabric is currently hanging in my daughter’s room, and it’s genuinely one of my favorite things in our house. The colors shift throughout the day as the light changes, and it costs less than a pizza.
Custom Tie-Backs and Hardware
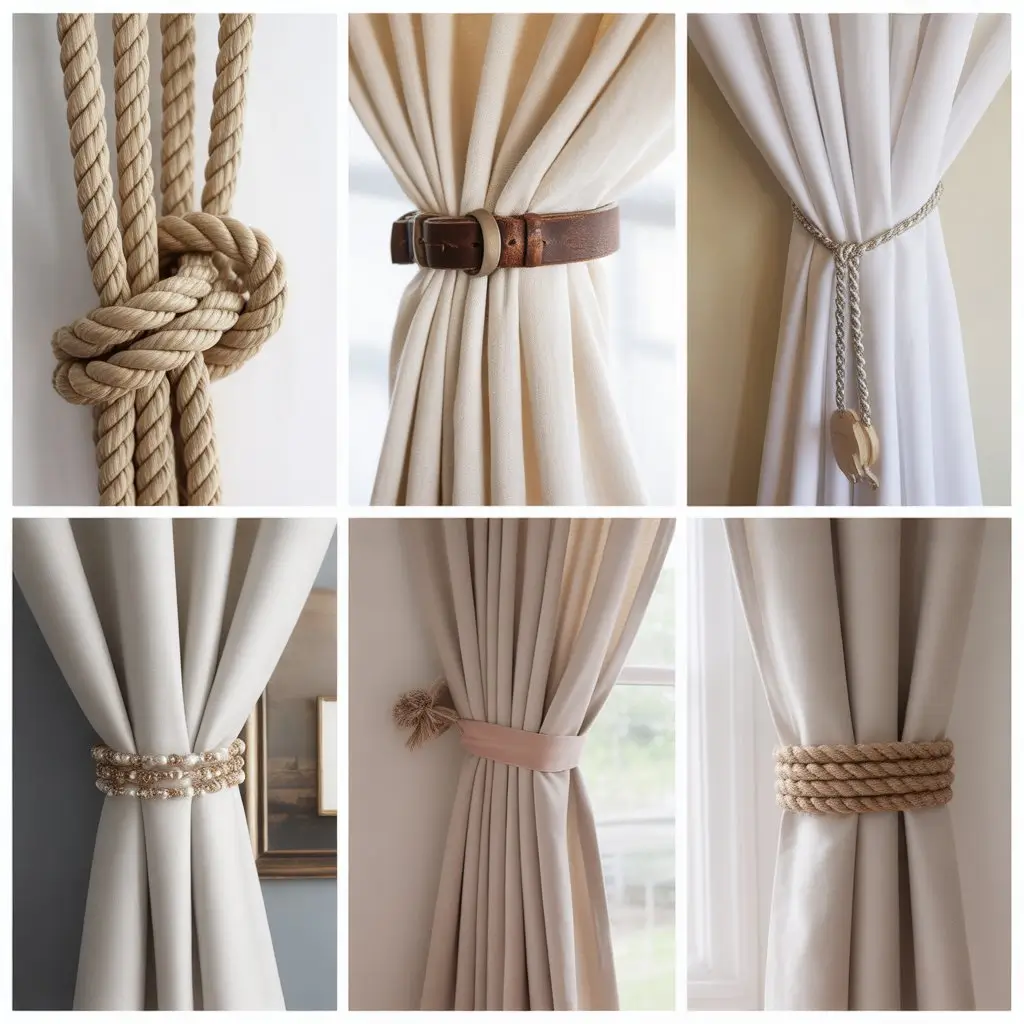
Here’s a quick win: replace boring tie-backs with something interesting. I’ve made them from rope (nautical vibe), vintage belts from thrift stores, beaded chains, and even just simple ribbon. Takes five minutes, costs almost nothing, and completely changes the look.
For curtain rods, I’ve gotten creative, too. Our bedroom uses copper pipes from Home Depot ($12 for materials) mounted on simple brackets. They’ve developed this beautiful patina over five years, and everyone asks where I bought them.
Money-saving trick I use constantly: Buy the cheapest white or neutral curtains you can find (IKEA’s Lenda panels are perfect), then customize them. I’ve added trim to the bottom, painted patterns with fabric paint, dyed them completely different colors, and sewn on contrasting bands of fabric. You end up with custom-looking curtains for a fraction of the cost.
Smart Solutions and Modern Technology
I’ll be honest—I was skeptical about smart window treatments. It felt excessive. But then we installed motorized blinds in our living room (birthday gift from my in-laws), and I kind of get it now.
We have the IKEA Fyrtur blackout blinds ($129 each, which is surprisingly reasonable for motorized). They’re programmed to close at sunset and open at sunrise, which sounds lazy but is actually really nice for energy efficiency. During Portland’s winter, when it’s dark by 4:30 pm, the blinds close automatically and we’re not losing heat through the windows all evening.
Are they necessary? Absolutely not. Do they add a little luxury to everyday life? Kind of, yeah. If you have windows that are hard to reach—or if you have floor-to-ceiling treatments that are heavy to operate—motorization makes sense. For regular windows at normal heights, just get a stick.
Seasonal Changes (Without Storing Mountains of Fabric)
I used to think seasonal window decorating meant owning entirely different sets of curtains for summer and winter. Then I realized I barely have storage for our regular stuff, let alone alternate curtains.
Instead, I do smaller seasonal touches. In summer, I add lightweight sheer panels over our regular curtains—it makes everything feel airier and brighter. In winter, I remove the sheers and sometimes add a heavy canvas valance at the top for extra insulation (Portland winters are wet and cold, not snowy, but that dampness seeps through everything).
For holidays, I’ll add garland to curtain rods or drape string lights behind sheers. Takes ten minutes to put up, ten minutes to take down, and doesn’t require storing bulky textiles.
Gatsby’s contribution to seasonal decorating: Our cat has knocked down approximately forty-seven window decorations over the years. Every. Single. Holiday. I now secure everything with removable adhesive hooks. Learn from my chaos.
Special Window Situations
French Doors
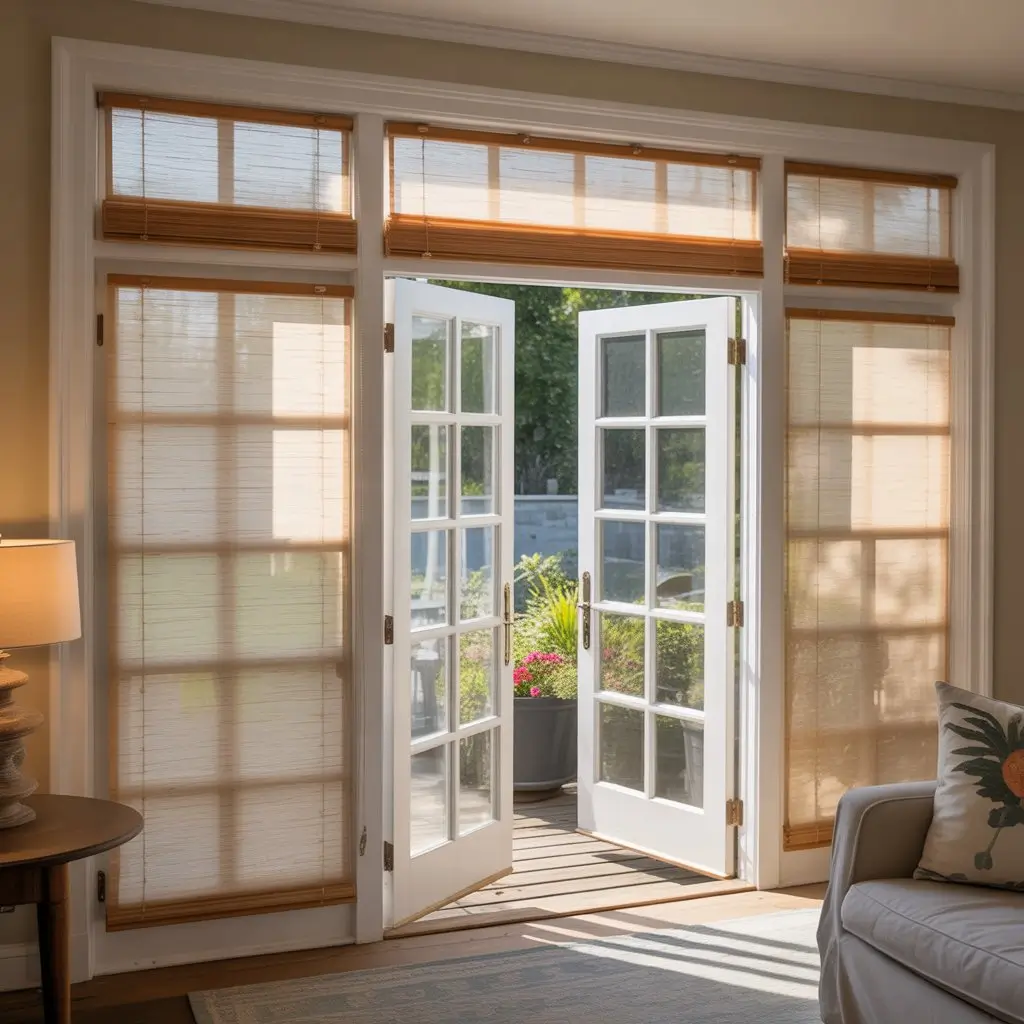
We have French doors leading to our back porch, and figuring out how to cover them without blocking access was genuinely frustrating. I tried regular curtains (annoying to pull back every time), tried stick-on privacy film (looked cheap), and finally installed roller shades that roll up completely out of the way. The shades diffuse light beautifully but don’t obstruct the doors at all.
Bay Windows
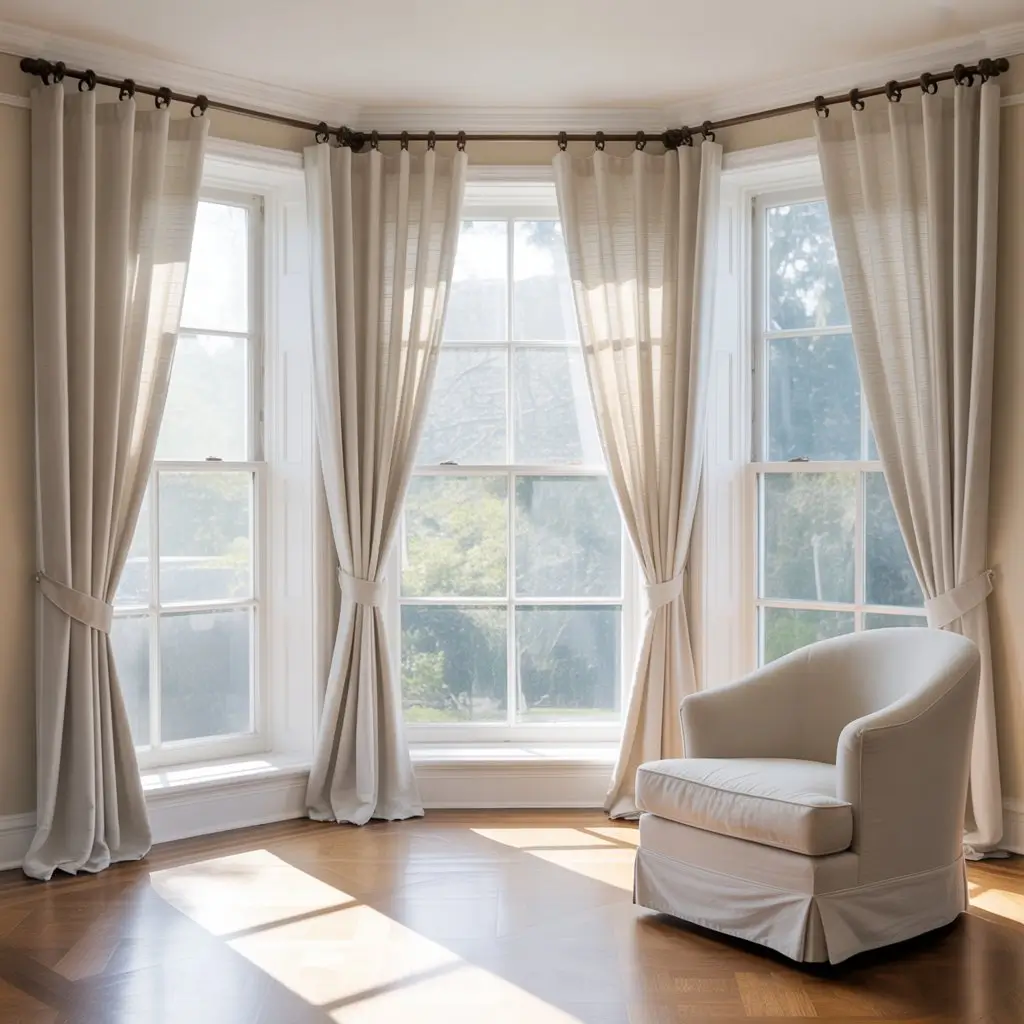
My neighbor has gorgeous bay windows and asked for my help dressing them last year. The trick with bay windows is embracing their shape rather than fighting it. We installed separate curtain rods for each section, creating this soft framing effect that highlights the architecture instead of covering it up. Total cost: about $200 , including rods and panels, which was way less than the $800 quote she got from a professional installer.
Rental-Friendly Options
Before we bought our house, we rented for years, and I became an expert in damage-free window treatments. Command hooks can hold lightweight curtains. Tension rods work for anything that doesn’t need permanent mounting. Removable adhesive film creates privacy without making holes.
The best rental hack I found: 3M Large Command Hooks ($8 for 4) on either side of the window frame, then hang curtains using clip rings. No holes, no damage, completely removable. Used this method in three different apartments, never lost a deposit.
What I Wish I’d Known From Day One
After fifteen years and too many window projects to count, here’s what I’d tell my younger self standing in that first house looking at those terrible beige blinds:
Measure three times, buy once. I’ve bought curtains in the wrong size four different times. It’s expensive and annoying. Write your measurements down. Check them. Check them again.
Wider is better. Curtain rods should extend 4-6 inches beyond the window frame on each side. This lets you pull curtains completely clear of the window, maximizing light. I didn’t know this for years and wondered why my windows always looked cramped.
Start with one window. Don’t do what I did and try to tackle every window at once. Pick one room, figure out what works, then apply those lessons elsewhere. Your wallet and sanity will thank you.
Cheap rods will make expensive curtains look cheap. I’ve learned this repeatedly. Spend a bit more on sturdy hardware—it makes everything hang better and last longer.
Light direction matters enormously. South and west-facing windows get harsh afternoon sun and need different treatments than north and east-facing windows. I now automatically consider this before choosing fabrics and colors.
The Thing About Windows
Nine years after moving into our bungalow, most of our windows are finally dressed in ways that make me genuinely happy. A few are still in progress (looking at you, weird octagonal window in the hallway). And honestly? That’s okay.
Windows are one of those home elements that you interact with constantly—you open them, close them, look through them, and adjust their coverings multiple times a day. Getting them right makes a massive difference in how your home feels. But “right” doesn’t mean expensive or complicated. It means thoughtful. Intentional. Personal.
Some of my favorite window treatments cost less than $30. Others I invested more in because they needed to last and perform. The common thread isn’t price—it’s that each one serves a specific purpose and reflects our actual life, not some catalog version of life.
So start small. Pick one window that’s bothering you. Try something. If it doesn’t work, try something else. Take inspiration from everywhere—design magazines, your friend’s house, that restaurant with the perfect curtains. And remember that even professional interior designers (hello) sometimes hang things backwards and have to start over.
Your windows are waiting to be transformed. You’ve got this.